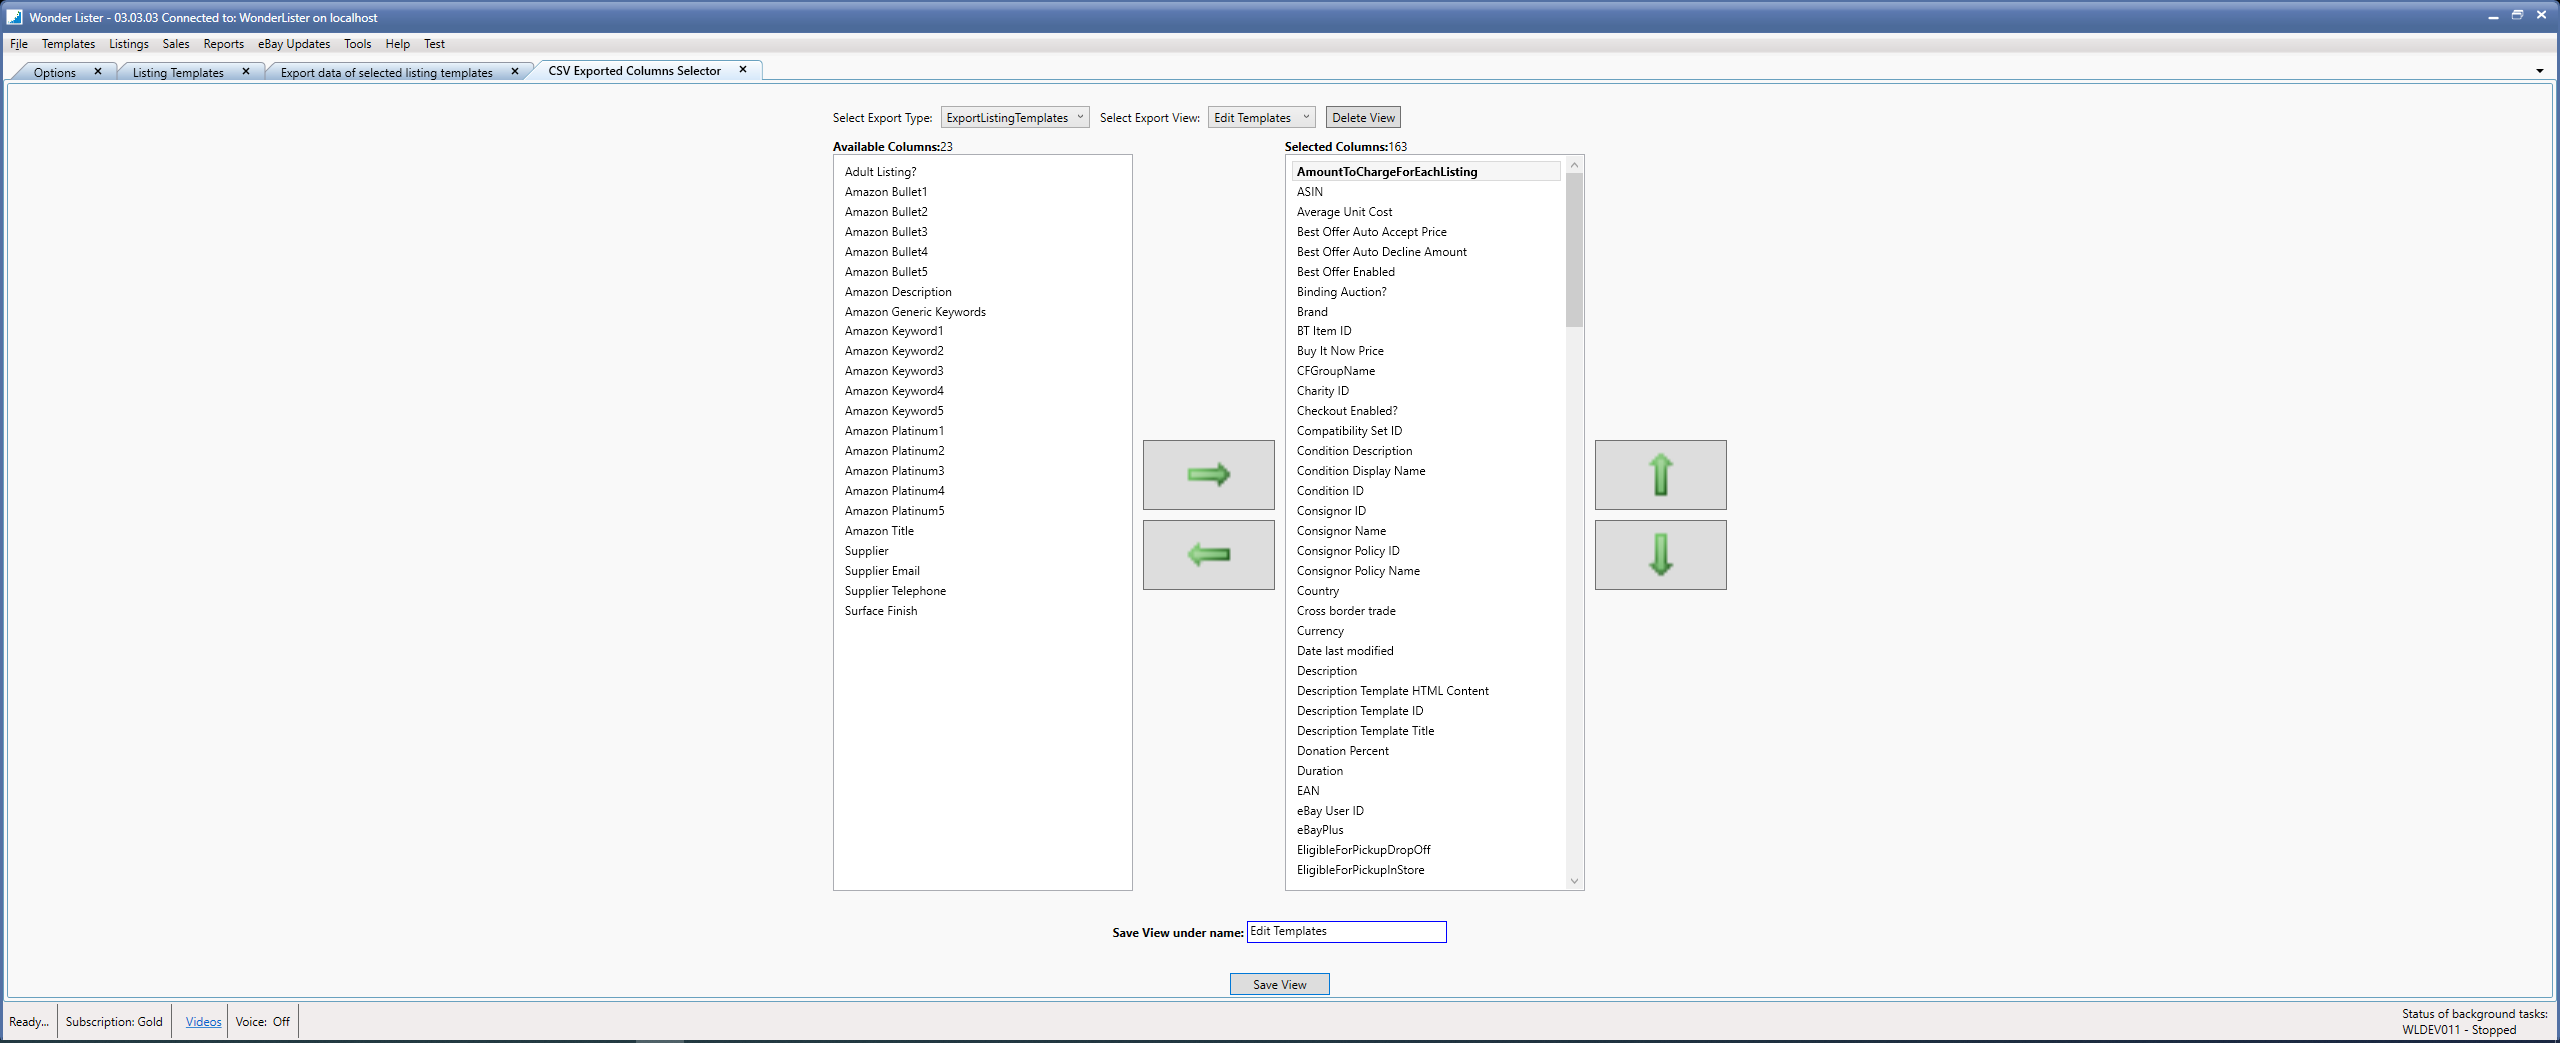
Use this tab to define the list of columns you want to export. The user interface looks like the following:
Field
Explanation
Select Export Type
Select the type of data you are exporting. Choices are:
ExportListingTemplates --> To export listing templates
ExportListings --> To export listings
Select Export View
Select a previously created export view to show its details. For very first view being created, the list will have no entries to choose from.
Available Columns
Displays all the available columns that can be exported. Select one/more columns that you wish to export and click the green right arrow to move them to the list of Selected Columns. The List is alphabetically sorted. To select all columns, simply press CTRL+A inside the box.
Selected Columns
Lists all the columns you have selected so far. If a column(s) has been wrongly selected, then, you deselect them by selecting them and clicking the green left arrow. The selected columns will be moved back to the Available Columns list. To change the order of columns, select one/more columns and click the Up or Down arrow keys to move accordingly. To select all columns, simply press CTRL+A inside the box.
Save View under name
Name of the view under which to save your selections. By default, the name is the same that you selected from the "Select Export View" selection box. You can change the name if you wish to save under a different name (the original name will still remain as it was). If you use an existing name, that view will be overwritten.
Button
Explanation
Delete View
Click this if you want the selected view to be deleted
Save View
Click this if you wish to Save the view (will Create a new View or edit an existing view depending on the name you entered)